It’s a well-worn saying, but a picture is still worth a thousand words. They can be worth even more if the pictures look good and tell a story.
As a siding contractor, photos of your work can be one of the most powerful tools in your marketing toolbox. They are visual proof of your craftsmanship and help potential customers see what’s possible for their own home.
The best part: you can do this yourself! Nearly every smartphone has a high-definition camera. With a little know-how, you can produce quality photos that tell a story and help attract new clients.
Photographing a House Before and After Renovations
1. Tell a visual story.
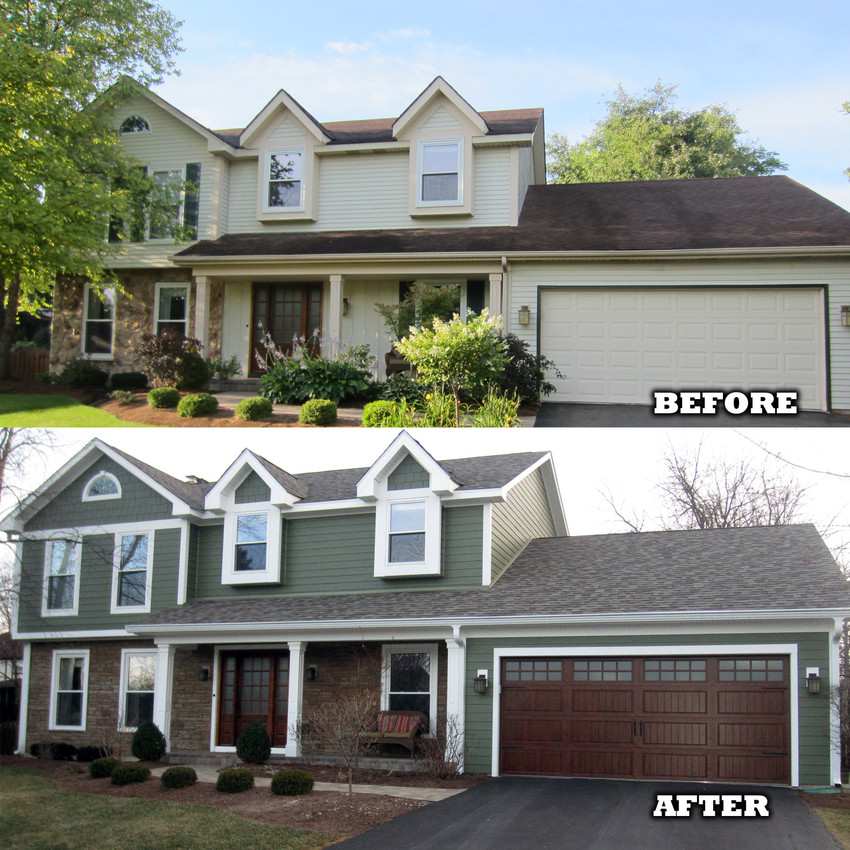
You’re telling a story of transformation – from the before to the after. First, you need to capture images of the house before any work starts or equipment clutters the yard. Next, you can take photos as work progresses as this will show the change (optional). Finally, the after photos will showcase the beautiful, final product.
2. Take your before and after pictures from the same angles (or as close as possible).
This will help viewers better visualize the improvements you made to the property. To help ensure you have the same angles, get into a routine of always taking pictures from the same spot for every property. Image the home at the center of a clock, and stand at 4, 6 and 8 to take your photos. Do a quick review of your photos to be sure the entire house is in the frame.
3. Take pictures in “landscape” format.
Horizontally oriented photos share better on most social platforms than vertically oriented ones.
4. Pay attention to the sun.
You want to take your photos in the most flattering light possible. Typically, that’s about as far from noon as you can get, while it’s still light outside. Mornings and evenings tend to offer the most flattering light for exterior photos. It’s OK if it’s an overcast day – clouds help diffuse light and reduce shadows, so you can take decent pictures at any time.
5. Make sure the property is clean and tidy before taking pictures.
This is important for both before and after photos. Ensure all vehicles, trash bins, signs, equipment and people are not in the image. Your goal is to minimize distractions so people focus on your work.
6. Use your phone’s light balance function.
You can adjust the lightness or darkness of the photo before you take it. With your phone’s camera app open, tap the area you want the camera to focus on. Then, slide your finger up or down to adjust the exposure. This will help you get a better looking photo the first time.
Use Your New Photos


Now that you have a steady stream of quality photos, it’s time to show them off.
Instagram is one of the best platforms for sharing photos. When posting, be sure to use hashtags to get them in front of more people. You can reach local audiences by adding a hashtag of the name of the town you’re working in (for example, #pleasantville).
Tag your pictures with
#MyHardieHome and we may repost them on James Hardie’s
Instagram,
Twitter and
Facebook accounts.